Hello all,
Welcome to the Teutonic Slaughterhouse!
A three player "all-versus-all" game of Warmaster Medieval. Each player had 1250p armies and the scenario was the fun "Seize and Control" that can be found here.
But in essence, four pieces of terrain would award one point each after each turn - the one with the most points at the end would win regardless of other victory points etc.
But in essence, four pieces of terrain would award one point each after each turn - the one with the most points at the end would win regardless of other victory points etc.
Without spoiling the final result, I can reveal that it was bloody, very bloody and that we all won, but in very different ways.
I was going to use the program called "battlechronicler" but alas, my laptop does not have the brain-power needed to run it while we play - so this will be a very picture heavy report - all pictures are clickable etc.
Deployment
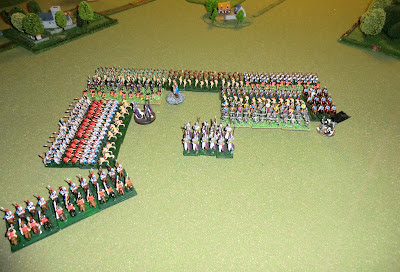
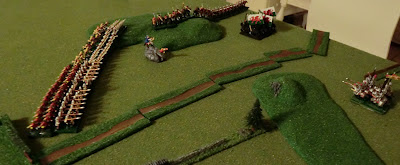
As can be seen our armies were deployed quite close but with on average 45cm between each zone. The terrain that would grant control-points were the central hill, the two villages on either side and the forest in the centre of the picture.
My army - House of York - consisted of a general and hero, two heavy cavalry units, four Irish warbands, three combined units of Longbows and Shire billmen, and two of longbows and peasants... Look closely, because they will soon be gone :-).
The Almoravid Moors army had a general, leader and subordinate, one heavy cavalry and three light Jinetes, two of the excellent Blackguard-infantry units and seven Spearmen and Archers all combined.
The blitzkrieging Teutonians - a general and hero, two light horses, two crossbowmen and spearmen combined units and then a stunning two Crusader Knights and three (!) units of Brother Knights....
We have a small "house-rule" which allows all skirmishers a free move after deployment - the light Jinetes ran further along each flank while the Teutonian "light" horses moved into the centre.
Turn 1
The House of York had a bad feeling about this game - and the first turn was a nightmare! After a few simple moves my Hero blundered and got the "Heavens forbid" result - the Irish in question would be -1 to command for the rest of the battle. My position was not ideal on either flank but I was hoping to remedy it afterwards - but two orders was not enough to get anyone into the positions I was hoping for.
And this was my downfall - the Teutonians pounced upon my weakest flank with two eager units of Brother Knights. Making three orders in a row (on both sides of the table!) they charged around the village and attacked in full force a weak unit of Longbows/peasants.
In the centre they didn't move while all eyes were on the flanks.
The right flank where Teutonians and Moors were eyeing each other closely.
And then slammed into my Cavalry. In their flank. Sigh...
And quickly destoryed half of them. Still turn one... Sigh.
This was their position after the end of the last combat of turn 1 - I had managed to kill one stand but had lost a scary amount of troops and all my units had their backs to the situation and would thus not be able to do anything about it - they couldn't even evade the fearful knights.
Scenario Victory Points:
Almoravid Moors: 1
Teutonic Order: 0
House of York: 0
Turn 2-3
Meanwhile, on the other flank some skirmishing devils played the shooting game with my infantry units oin that side - note how one stand is in the Wood. I managed to get a few cheap victory points through such sneaky tactics :-).
Yet, the Teutonic Horde was quite simply destroying my army. In the left corner are two Brother Knights, smashing British troops. As all my units had their backs turned this was the perfect attack. Nothing I could do but remove units.
The Muslim commander can lean back and relax, as we Christians kill each other (very historic, that).
The Teutons continue their rampage. While they kill these infantry units easily, this was perhaps a small mistake as it left them out of sight of more of my units. This left them a bit stranded, as they did not want to engage the entire Muslim army.
Meanwhile the Teutons on the other side kept getting confounded by the quick skirmishing cavalry who evaded their every charge.
My casualties... and the two stands of Brother Knights that caused them. Sad. Very sad.
Scenario Victory Points:
Almoravid Moors: 3
Teutonic Order: 0
House of York: 4
Turn 4-5
The Teutons find skirmishing cavalry on all flanks. My infantry has pulled back and begins unloading arrows into the back of the knights, exacting a bit of revenge.
The Muslim army, still untouched by the war.
Look - I manage to smile, even though my army lies ruined :-). The view is from the Muslim-Teutonic flank - the skirmishing horses really kept the threat at bay.
The Muslim army - calm as the faith they share.
I manage a few lucky shots which confuses key Teutonic units just as they were ready to grab the central victory zone.
My infantry hiding from the scary Knights, who in turn are trying to corner the Skirmishers.
The Muslims finally wise up and contest "my" forrest. Its getting crowded in there :-).
More confusion as the Ligth Horse of the Teutons attempt a charge at a solid block of infantry - getting maimed in the process. Yet, they keep the troops from the central hill.
My troops grabbing another forrest and shooting arrows at the unmoving Teutons.
The Muslims begin moving against the knights on the extrem flank.
And grabbing another central point.
The final field of battle... much British blood was shed this day.
Final Score
Scenario Victory Points:
Almoravid Moors: 5
Teutonic Order: 0
House of York: 7
Casualty points lost:
Almoravid Moors: 0
Teutonic Order: 360
House of York: 745 (auchie)
Final Comments:
A great game - the scenario worked perfectly. And as an added bonus we all won; The Teutonic Brotherhood won as this was the perfect game for them - the best charge ever that killed almost an entire army. Those knights are truly amazing when facing unprepared enemies. And an entire army of infantry with their backs turned truly constitute the pefect target. The Mulims won as they managed to hold all enemies of and suffered zero casualties. And my Yorkian army also won as we managed to grab the most victory points from the scenario making us the true victorious army, although we suffered dearly for our victory.Great game, hope you enjoyed this brief photo-report :-).
All the best,
Kasper


Great report and nice pictures and armies too.
ReplyDeleteTom
As always a great AAR,
ReplyDeleteJason